Hardware Hacking 101
Objective (main)
Ready your tools and sharpen your wits—only the cleverest can untangle the wires and unlock Santa’s hidden secrets!
Hardware Hacking 101 Part 1
Objective
Jingle all the wires and connect to Santa’s Little Helper to reveal the merry secrets locked in his chest!
Silver
In the hint section I found this helpful hint:
On the Cutting Edge From: Morcel Nougat Terminal: Hardware Part 1 Hey, I just caught wind of this neat way to piece back shredded paper! It’s a fancy heuristic detection technique—sharp as an elf’s wit, I tell ya! Got a sample Python script right here, courtesy of Arnydo. Check it out when you have a sec: heuristic_edge_detection.py."
I downloaded the script:
import os
import numpy as np
from PIL import Image

def load_images(folder):
    images = []
    filenames = sorted(os.listdir(folder))
    for filename in filenames:
        if filename.endswith('.png') or filename.endswith('.jpg'):
            img = Image.open(os.path.join(folder, filename)).convert('RGB')
            images.append(np.array(img))
    return images

def calculate_difference(slice1, slice2):
    # Calculate the sum of squared differences between the right edge of slice1 and the left edge of slice2
    return np.sum((slice1[:, -1] - slice2[:, 0]) ** 2)

def find_best_match(slices):
    n = len(slices)
    matched_slices = [slices[0]]
    slices.pop(0)

    while slices:
        last_slice = matched_slices[-1]
        differences = [calculate_difference(last_slice, s) for s in slices]
        best_match_index = np.argmin(differences)
        matched_slices.append(slices.pop(best_match_index))

    return matched_slices

def save_image(images, output_path):
    heights, widths, _ = zip(*(i.shape for i in images))

    total_width = sum(widths)
    max_height = max(heights)

    new_image = Image.new('RGB', (total_width, max_height))

    x_offset = 0
    for img in images:
        pil_img = Image.fromarray(img)
        new_image.paste(pil_img, (x_offset, 0))
        x_offset += pil_img.width

    new_image.save(output_path)

def main():
    input_folder = "/mnt/c/Users/Roger Johnsen/Downloads/HHC2024/shreds/slices"
    output_path = "/mnt/c/Users/Roger Johnsen/Downloads/HHC2024/assembled_image.png"

    slices = load_images(input_folder)
    matched_slices = find_best_match(slices)
    save_image(matched_slices, output_path)

if __name__ == '__main__':
    main()
I only changed the “input_folder” and “output_path” variables and ran the script. Once finished, it assembled the pieced into this image:
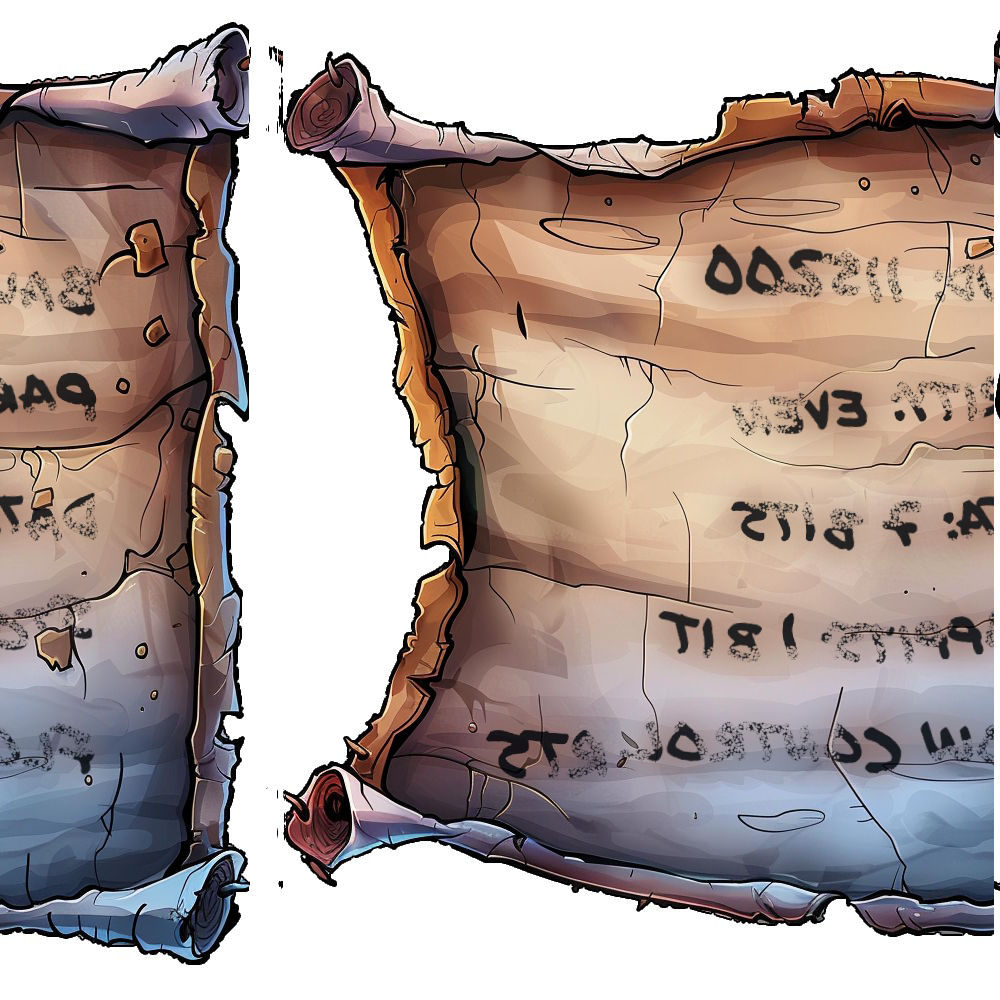
Image isn’t particularly easy to read. Thus some manual work needs to be done:
- Image assembled are mirrored. In order to mirror it readable, I used this site which offers basic image editing tools: https://www.resizepixel.com/
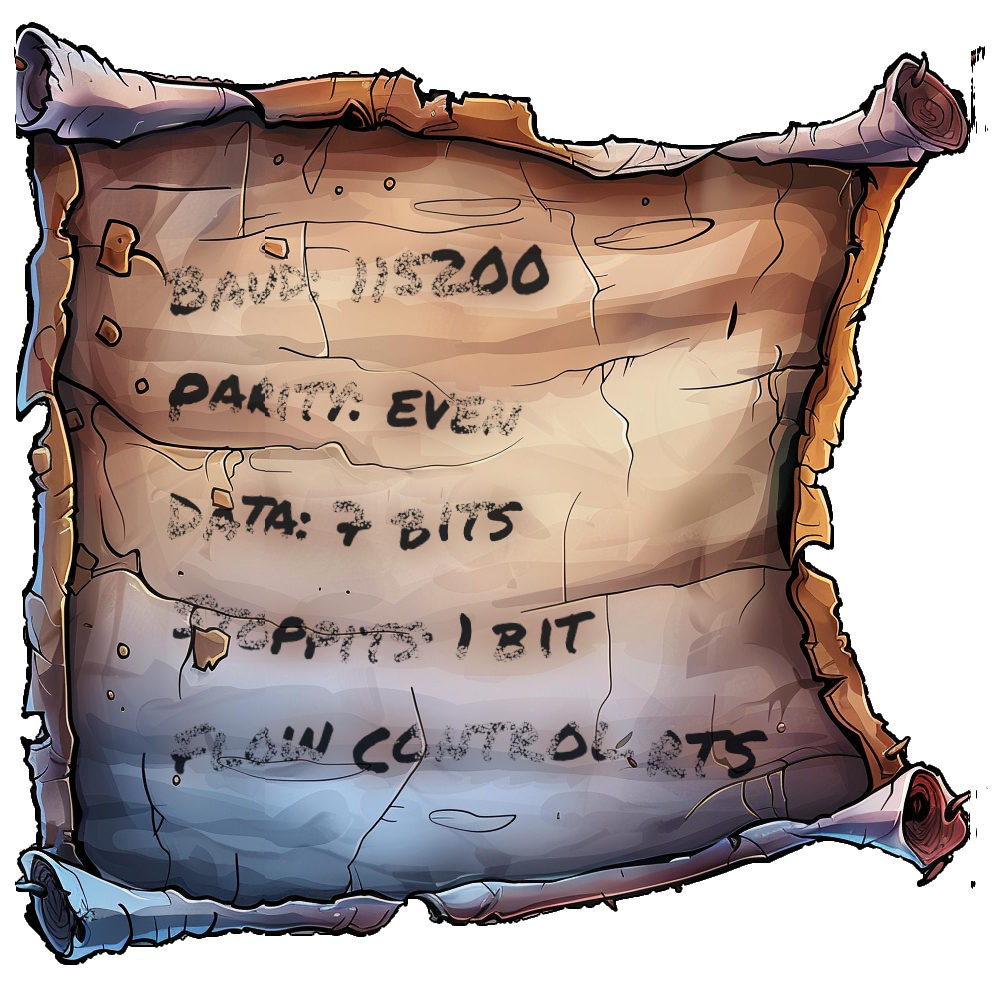
- After mirroring the image, I used https://www.photopea.com/ to rearrange the elements in the picture, making the whole lot readable:
Opening the task itself, we are presented a book:
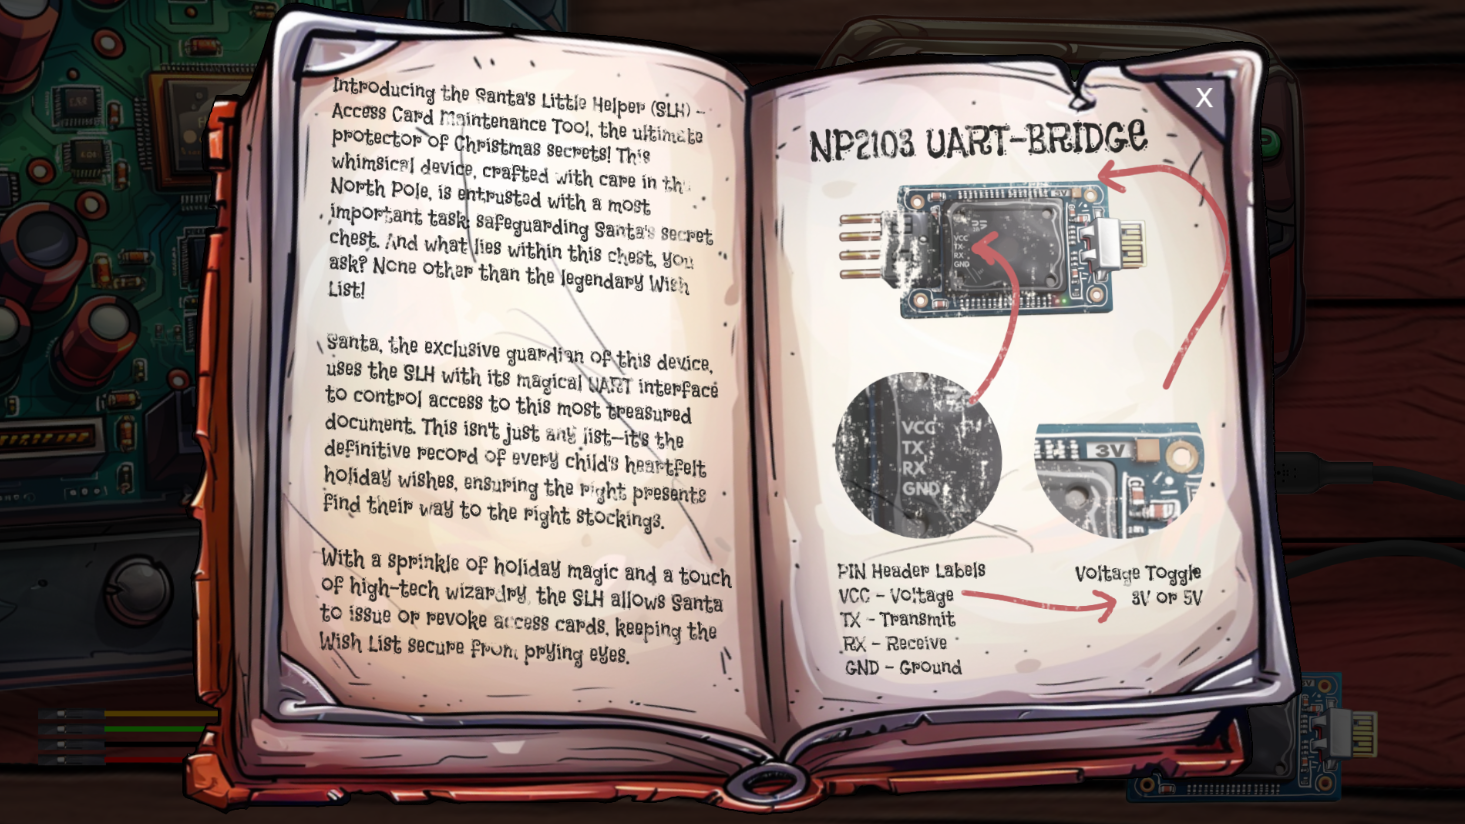
And by closing the book we are presented with a nifty play area:
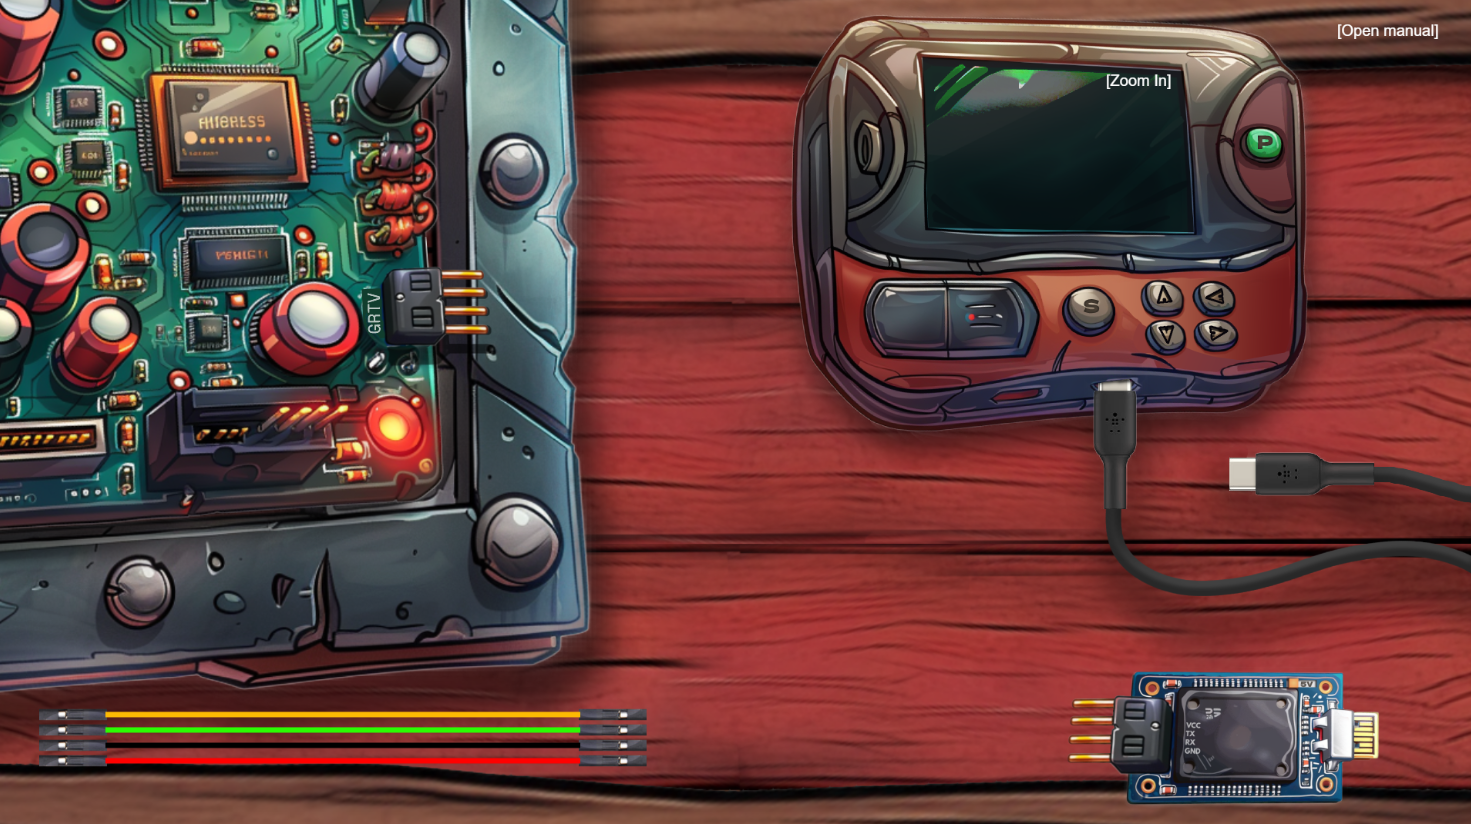
Connecting the wires game! The way I solved was to
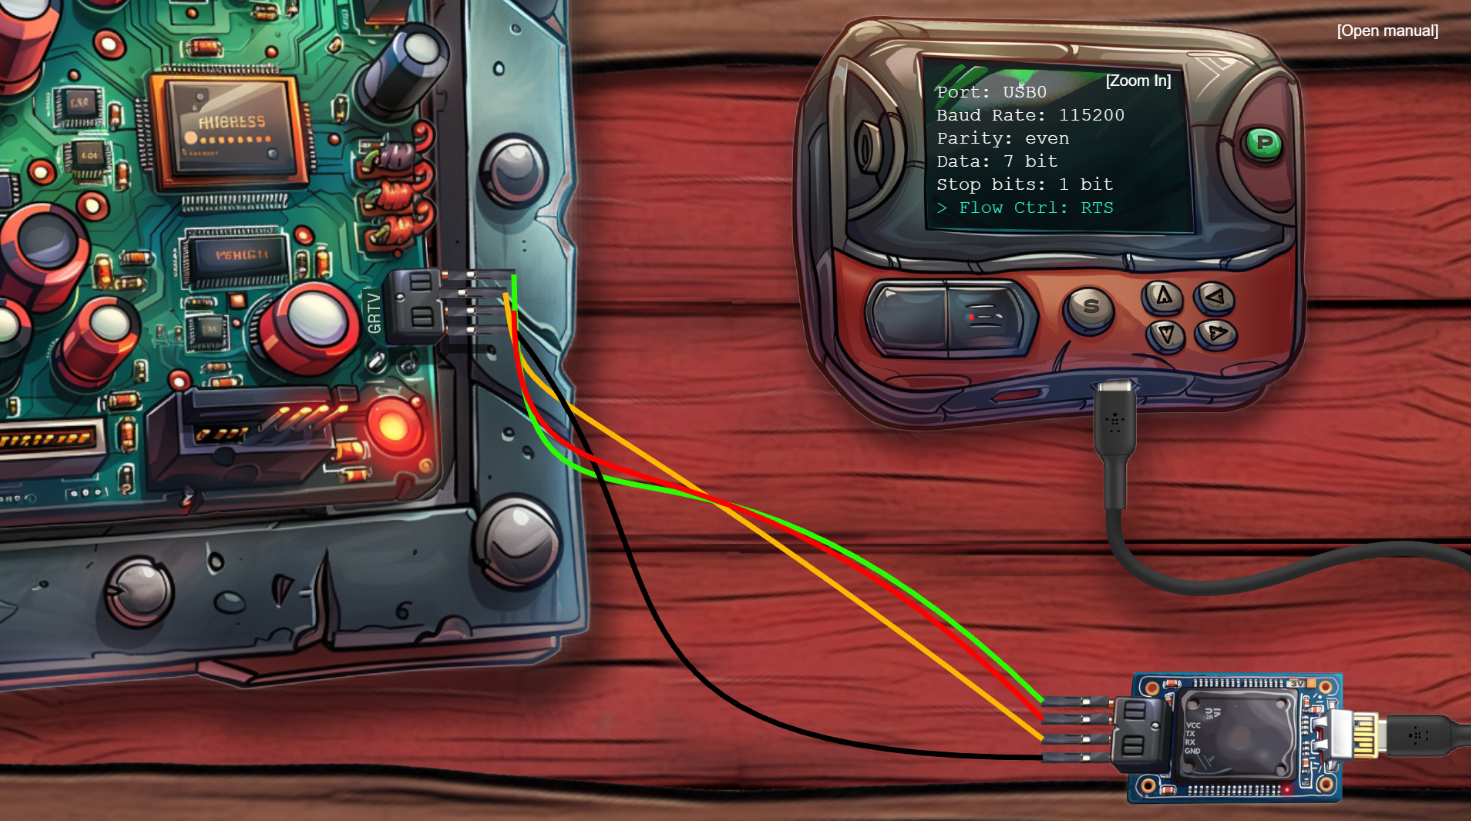
- Power up the controller (upper right corner)
- Enter the values from the shredded note (see controllers screen)
- Conenct USB from controller to UART bridge.
- Connecting the wires completely willy-nillingly from UART bridge.
- Selecting a port on the controller.
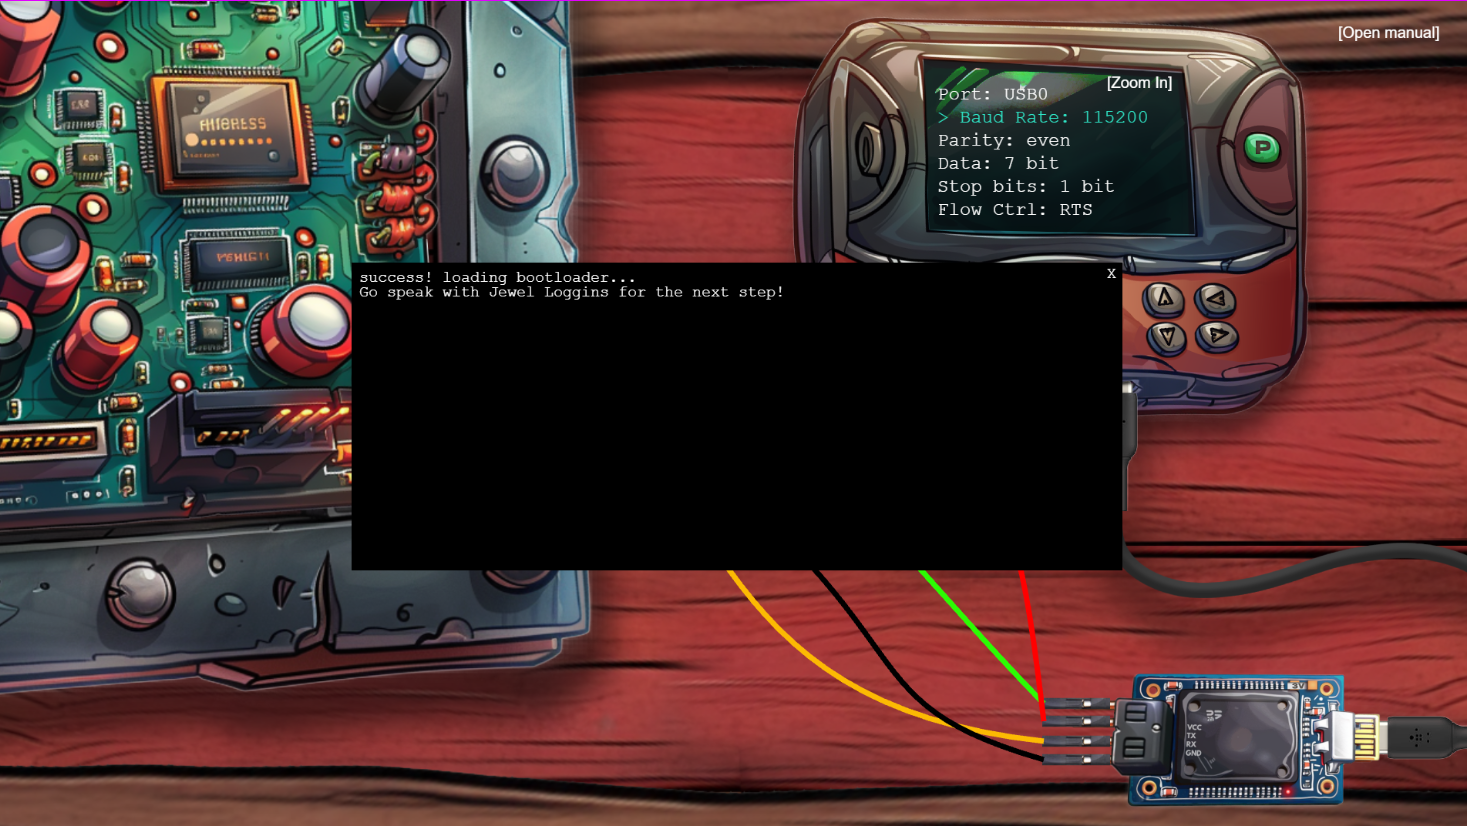
- Hit “S” button on the controller to see if it worked.
Well. That was the general recipe. In real life, though, I had forgotten to flip the 5V switch over to 3V - so things got a bit toasty here and there. And I also had to cycle the com ports before eventually landing on using USB0.
And by this silver was won!
Gold
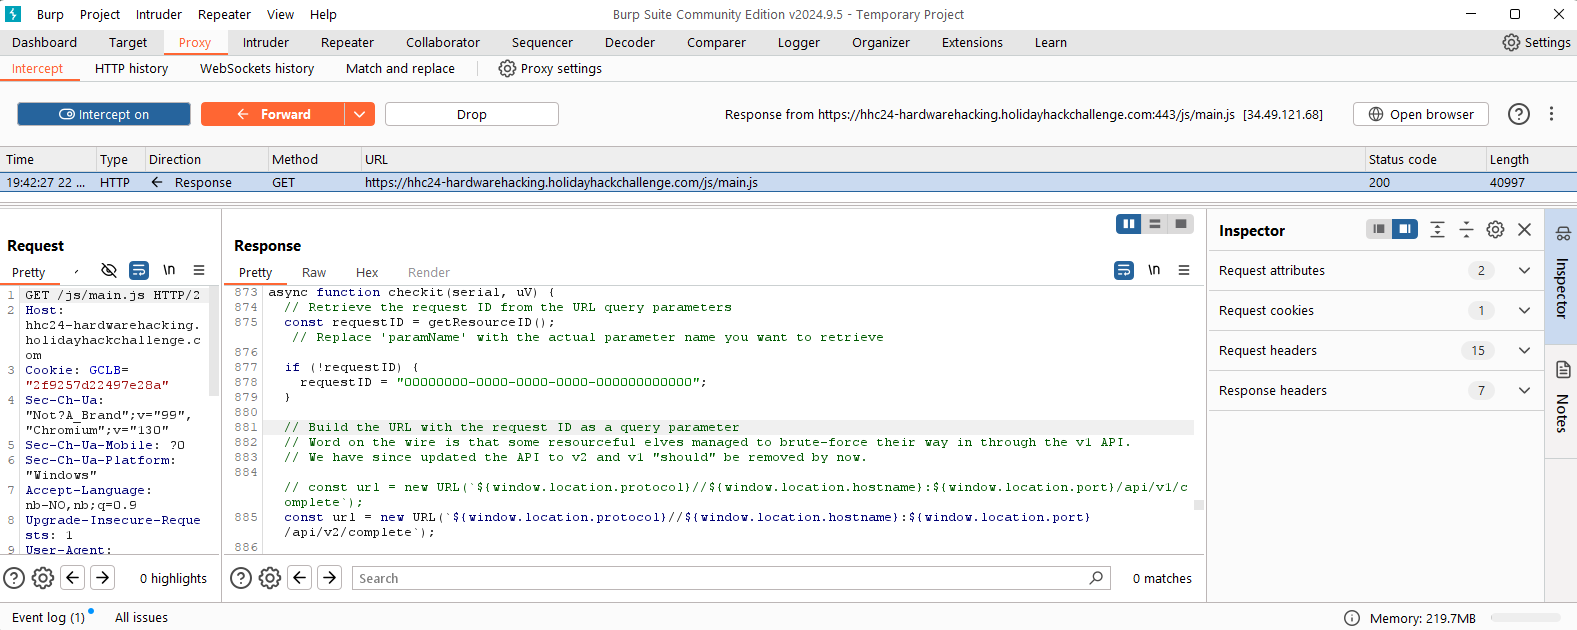
For going for gold, I first found the Iframe source:
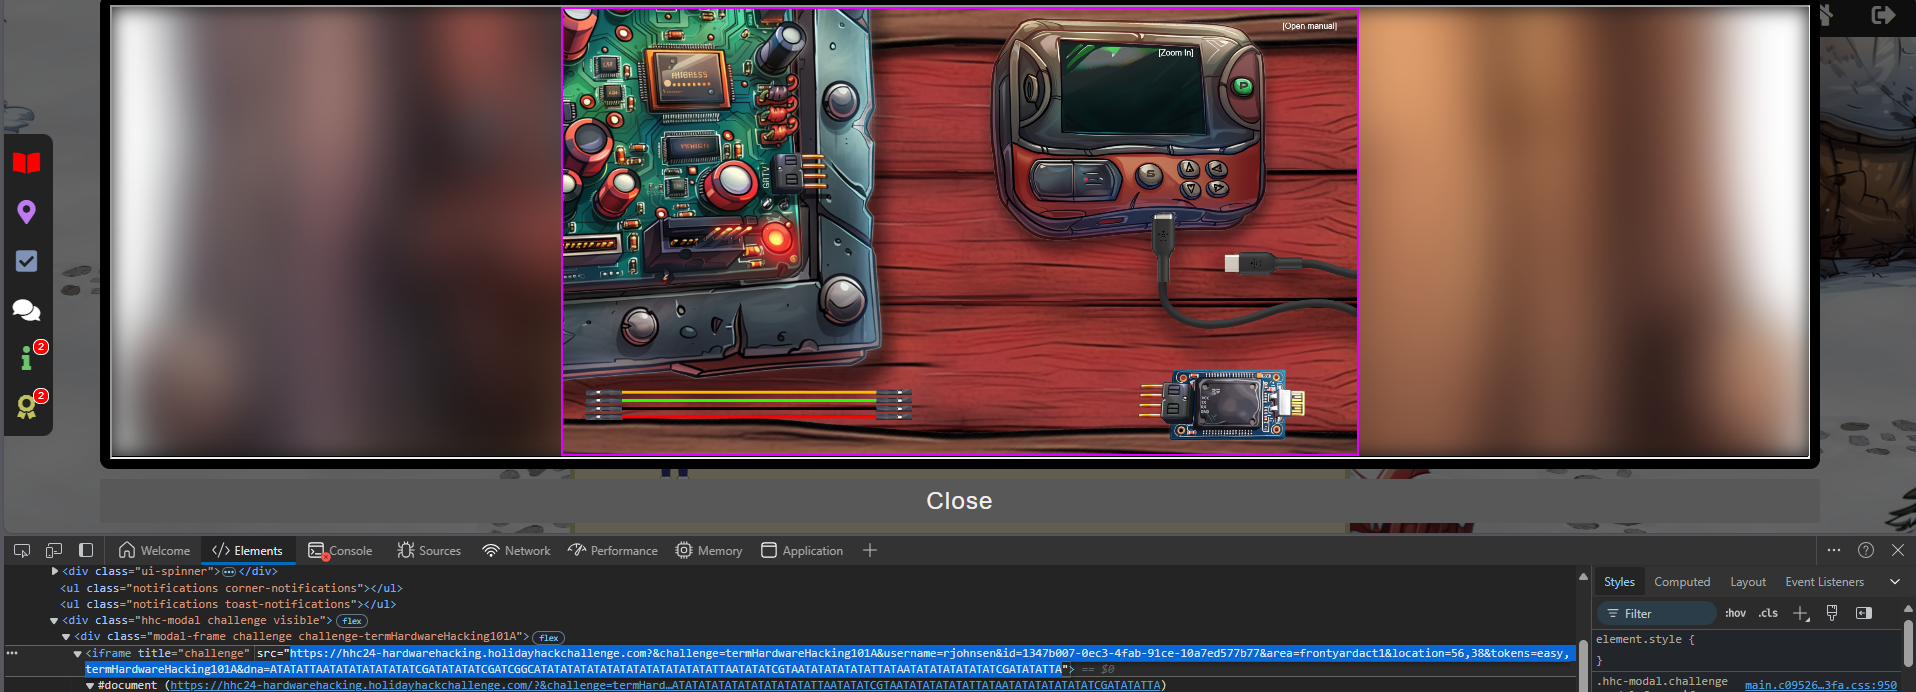
Then ran that URL through BurpSuite Browser, where I found a reference to V1 of the API. This hint was located in “main.js” script file.
Having captured the post request to solve the game using V2 of the API (basically the same as the GUI game), I just changed the text to refer to V1 of the API:
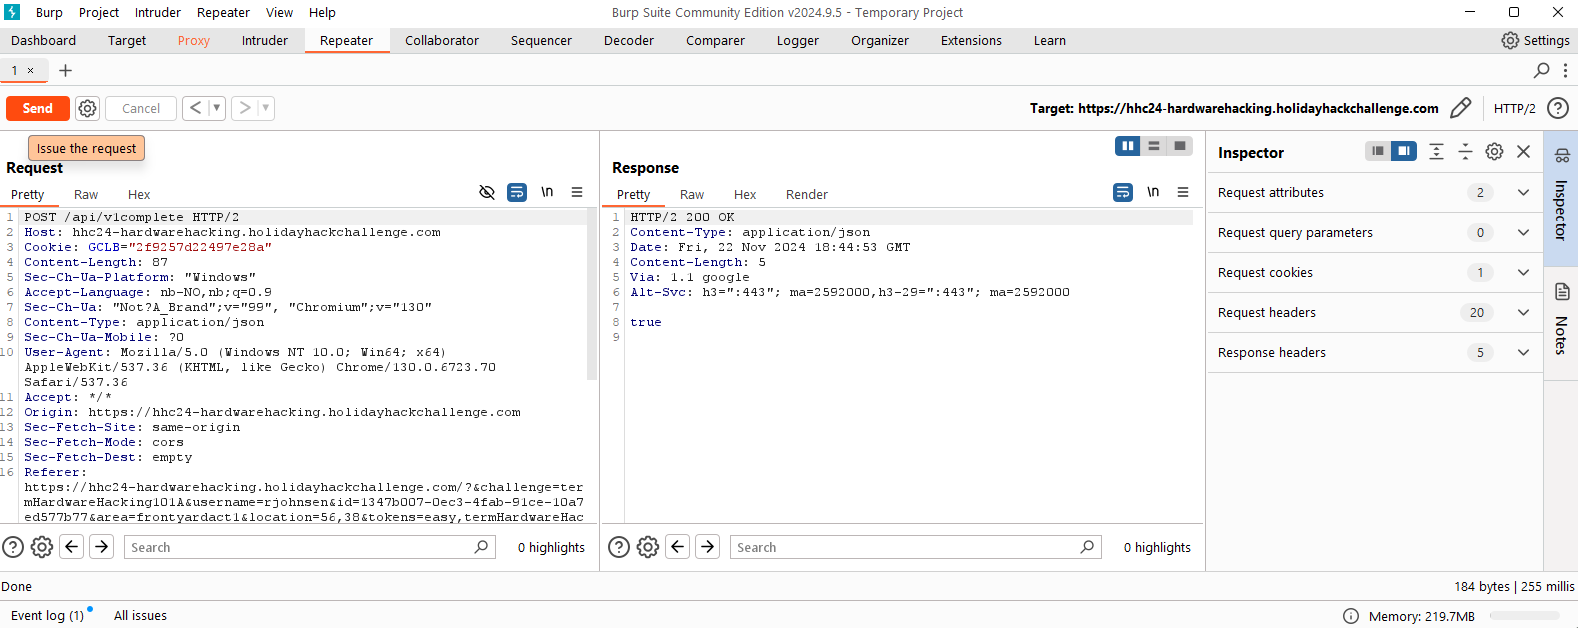
Done.
Hardware Hacking 101 Part 2
Santa’s gone missing, and the only way to track him is by accessing the Wish List in his chest—modify the access_cards database to gain entry!
Solution for Silver
Jewel Loggins also gives the following tips:
Fantastic! You managed to connect to the UART interface—great work with those tricky wires! I couldn’t figure it out myself…
Rumor has it you might be able to bypass the hardware altogether for the gold medal. Why not see if you can find that shortcut?
Next, we need to access the terminal and modify the access database. We’re looking to grant access to card number 42.
Start by using the slh application—that’s the key to getting into the access database. Problem is, the ‘slh’ tool is password-protected, so we need to find it first.
Search the terminal thoroughly; passwords sometimes get left out in the open.
Once you’ve found it, modify the entry for card number 42 to grant access. Sounds simple, right? Let’s get to it!
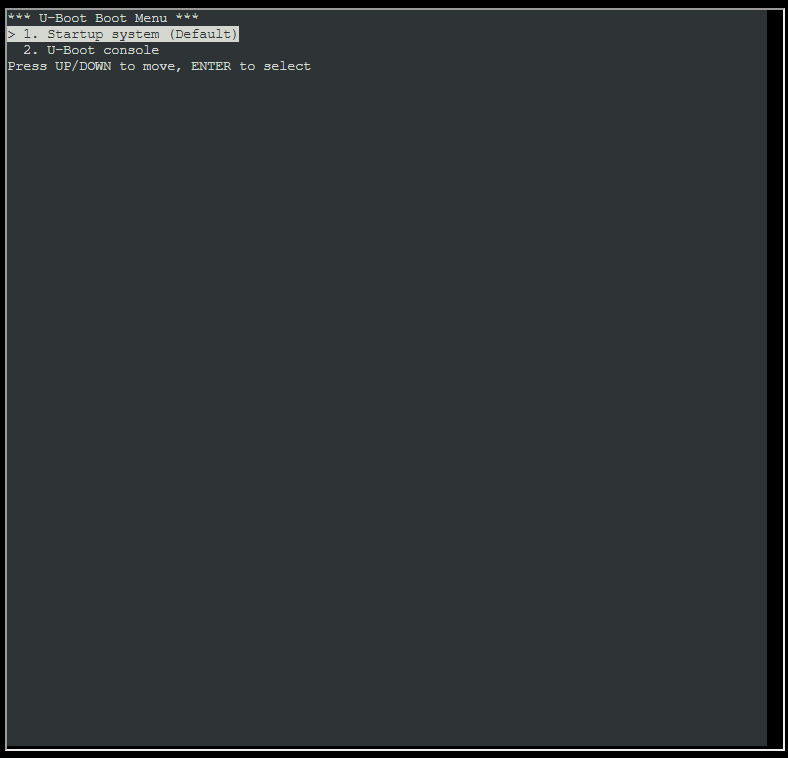
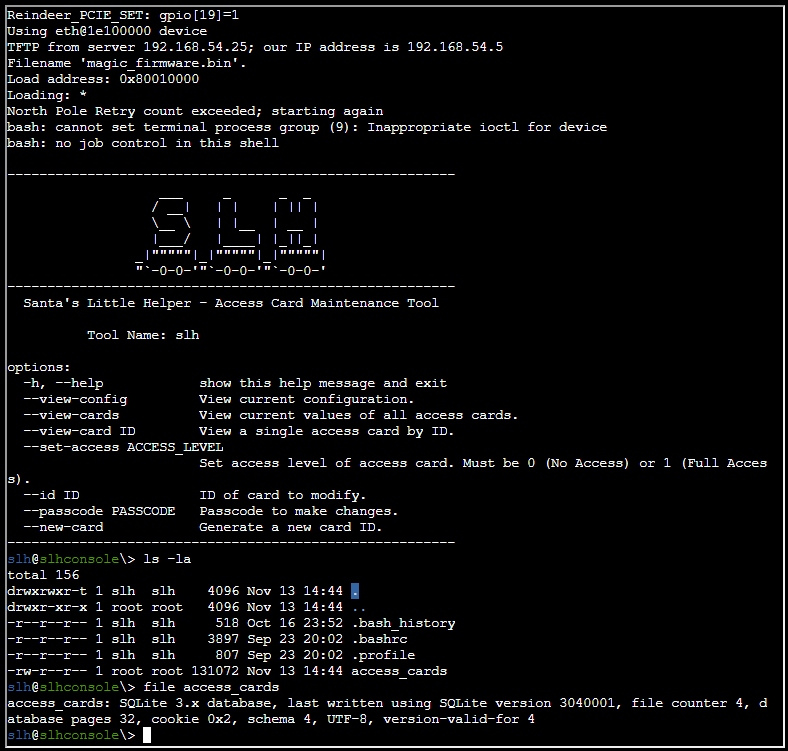
Opening the terminal, selecting option 1 (“Startup system …”):
Taking a look around the folder I am currently in, I find a SQLite database:
Taking a look at the bash history, I found a password (in a command string):
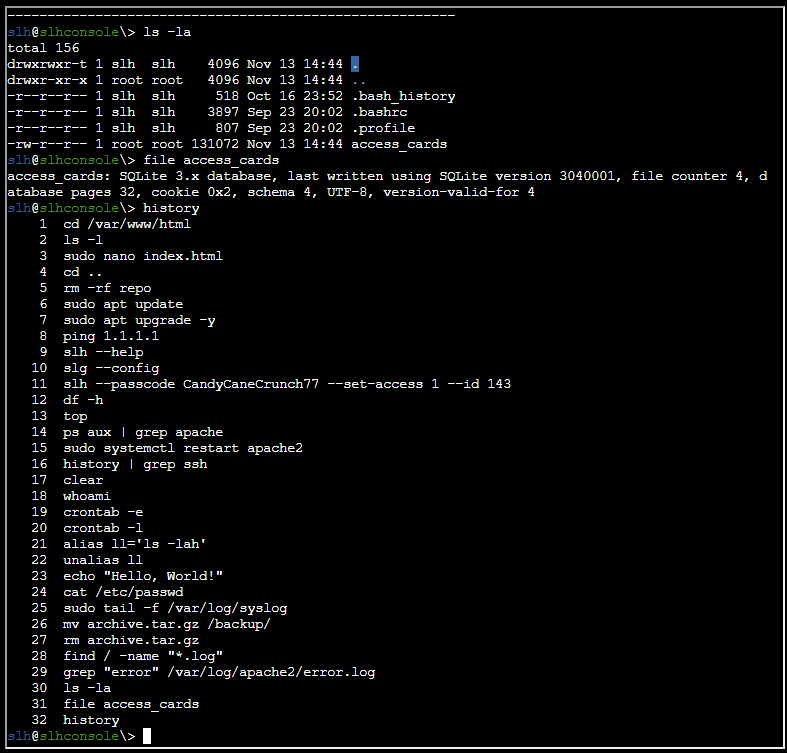
The command string is:
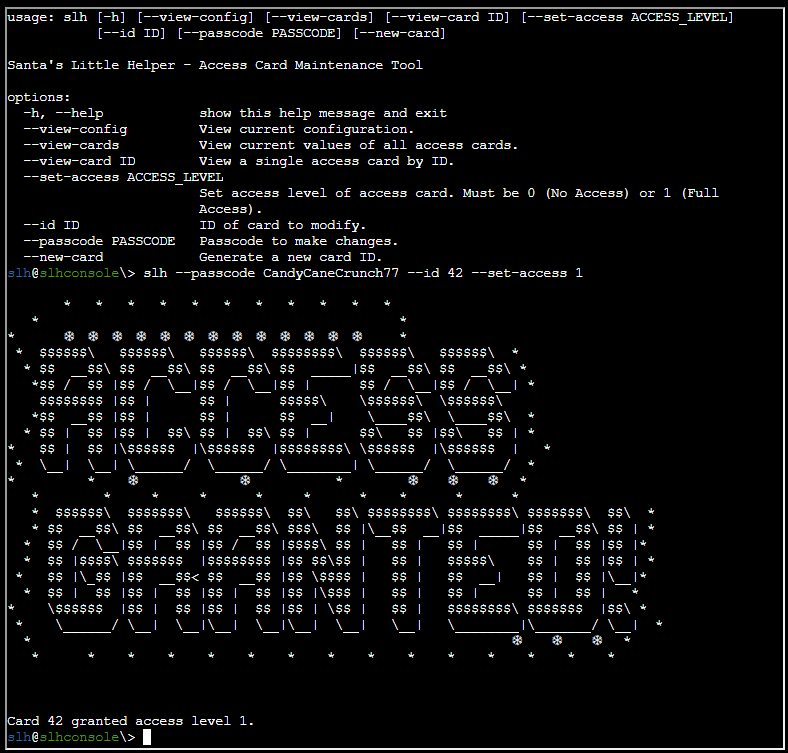
slh --passcode CandyCaneCrunch77 --set-access 1 --id 143To solve this I consulted the help section using the command slh --help, which then made me better understand how to use it:
Solution for Gold
Jewel Loggins gives following hint regarding the Gold solution:
There’s a tougher route if you’re up for the challenge to earn the Gold medal. It involves directly modifying the database and generating your own HMAC signature.
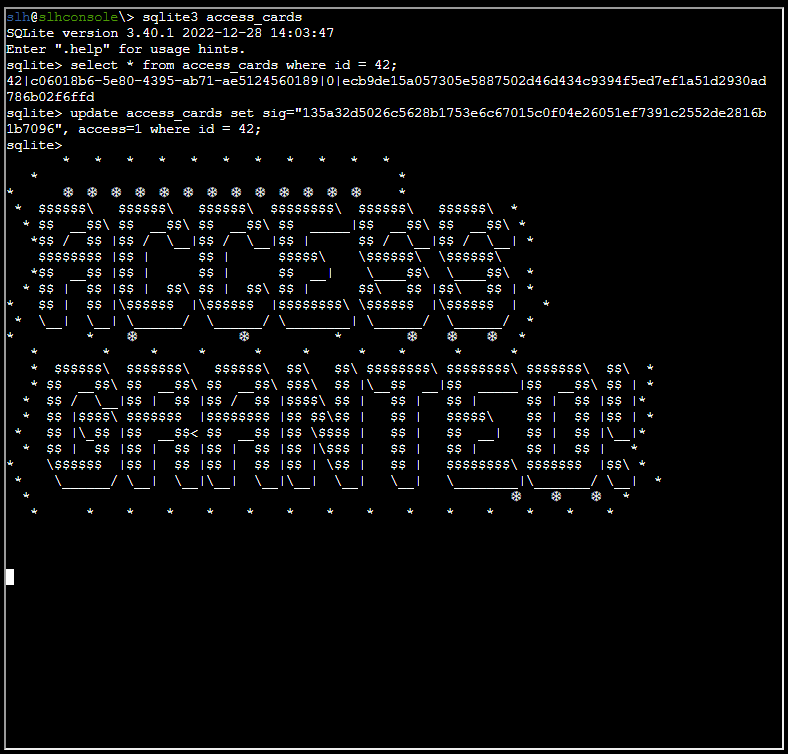
We already know the location and name of the SQLite database, so let’s connect:
sqlite3 access_cards
.tables
select * from config;
select * from access_cards where id = 42;
PRAGMA table_info([access_cards]);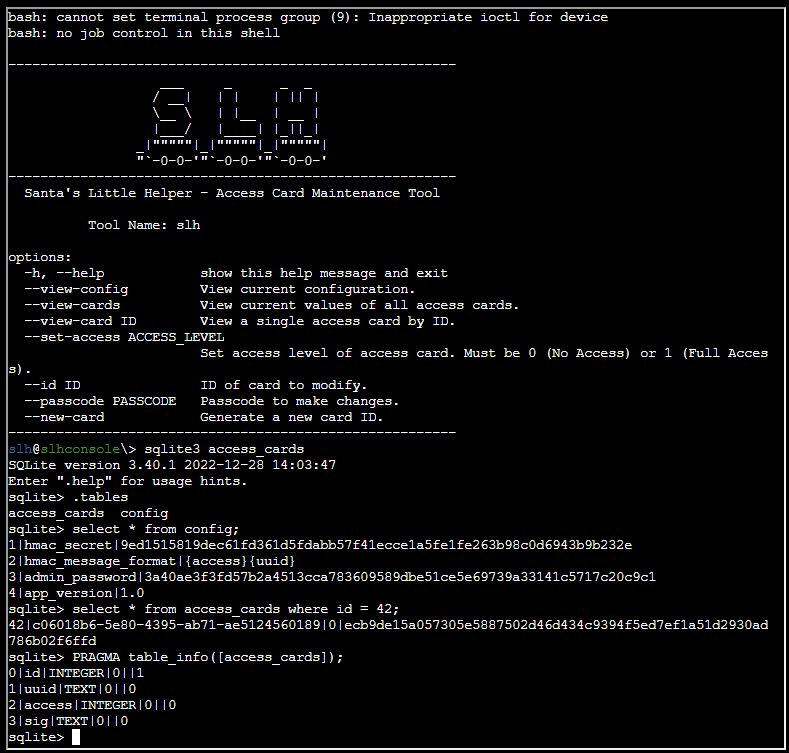
From the content of table of “config” and “access_cards”, we’ll be using the following information to craft our HMAC signature:
| What | Value | Comment |
|---|---|---|
| hmac_secret | 9ed1515819dec61fd361d5fdabb57f41ecce1a5fe1fe263b98c0d6943b9b232e | |
| hmac_message_format | {access}{uuid} | |
| UUID | c06018b6-5e80-4395-ab71-ae5124560189 | From table “access_cards” where ID is 42 |
In order for this to work, we have to use the following formula for input into the HMAC function in Cyberchef:
access_levelUUID = 1 + c06018b6-5e80-4395-ab71-ae5124560189 == 1c06018b6-5e80-4395-ab71-ae5124560189 Thus, concatening the access_level and UUDI without an delimiter. Then we can apply it like so in Cyberchef:
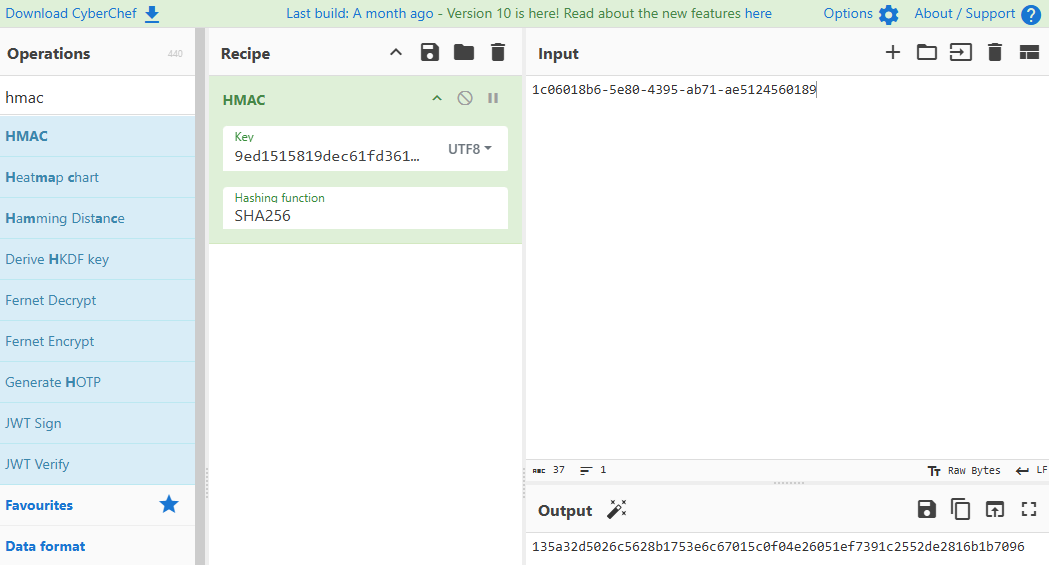
It took me forever to figure out that HMAC function was set up using Hex for key, which gave me the wrong output. Switched to UTF-8 as key format and that gave me the correct results. I then could run the following SQL update statement:
update access_cards set sig="135a32d5026c5628b1753e6c67015c0f04e26051ef7391c2552de2816b1b7096", access=1 where id = 42;And Bob’s your uncle! :)